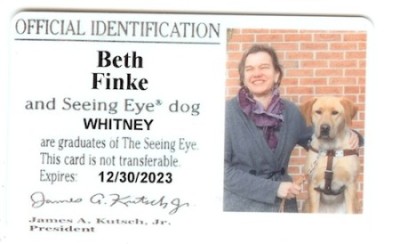
by Beth Finke
What is it about the month of December that makes you want to roll up your sleeves and attempt to make a soft, fragrant loaf of bread or chewy cookies to share with friends, family or coworkers? Is it because, as we’re in the midst of holiday cheer, we’re compelled to create something with our hands and from our heart to express our gratitude for the people who matter to us? Or is it because there is something comforting about getting lost in the meticulous steps of a recipe among the hustle and bustle of the season? Maybe it’s a time-honored tradition to make a recipe that is just as much a treasured family heirloom as your great-great-grandmother’s quilt.
For the rest of the month, we’ll be sharing stories about baking and cooking (including recipes!) from people with disabilities and their loved ones. If you make one of the recipes, we encourage you to share a photo with us on social media using the hashtag #InclusiveHolidays.
 Our son was diagnosed with developmental and physical disabilities when he was just one month old. Gus was immediately scheduled for physical, occupational and speech therapy, and when I Confided my worries about him to my sister that I didn’t notice Gus making progress, she introduced me to a friend of hers who had an eight-year-old daughter with severe disabilities. The first thing this woman recommended? “Start going to church.” She insisted this wasn’t for religious reasons. ““You’re with Gus every day, it can be hard for you to notice some of the little changes,” she said, explaining that people who see her daughter and her in church just once a week notice Susan’s progress. “They tell me so, and that can make me feel better.”
Worth a try.
I started checking out different churches to see where we might feel most comfortable, and the day I visited a nearby Presbyterian church, the pastor’s sermon happened to be a slide show of a construction project the church was sponsoring at a Down’s Syndrome institute in the Yucatan Peninsula. Gus and I would fit in well here. I started attending.
A month or two in to our religion experiment, it came time for the church’s yearly phonathon. I signed up to help. A fellow volunteer read names and phone numbers onto a tape recorder for me, I made the calls, raised money with the best of them, and all of us there were so busy that we never got around to eating the treats provided. At the end of the night all of us were asked if we’d like to take any treats home. Never shy when it comes to free food, I shouted “Yes!” and brought home a whole loaf of fancy, untouched, homemade bread.
The bread smelled sweet. I have Type 1 diabetes. I was afraid to eat it. My husband Mike wasn’t interested in it, either, so I told him to take it with him to work the next morning. “Tell them I made it myself,” I instructed. He’d just started a new job, and I wanted to impress his coworkers.
Ah, what a tangled web we weave. The coworkers loved the bread. “Tell her we want more!” One of his new colleagues even asked if she could come over and watch me so she could try making it herself.
Admit my lie, or learn to bake bread? I went with option #2. I called the church secretary to ask if she knew who’d provided the bread the night of the phonathon. “Oh, of course!” she said. “Charlie always bakes bread for the phonathon.”
Charlie? She didn’t mean Charlie, the Pastor, did she? “yes,” she said. “The pastor.”
Lucky for me, Charlie had a sense of humor. I called him, confessed my sin, he laughed and assured me I could bake bread on my own. Bread bakers rely strongly on the sense of touch, he said. Fingers confirm the water is lukewarm, you feel the dough to see if its risen, and you know you’re done kneading when the dough is easy to stretch, but not too sticky. “When would be a good time for me to come over and teach you?”
At my first and only lesson with Charlie, we used a recipe for a bread called “egg braid.” Charlie guided my hands through the stirring, kneading, baking, and glazing. He even taught me how to separate and egg (crack it in half, keep the yolk in one half of the shell , then just let the white drain into a cup below).
No need to teach me how to braid, though – I wore my hair long back then and had braided it for years. Once we were done assembling the loaves, he reviewed all the steps so I could translate them on tape in my own words.
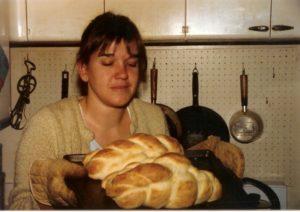
Ever since the winter Charlie taught me to bake bread, I’ve baked loaves of homemade egg braid to share with friends and family during the holidays. To my Jewish friends, it’s Challah. So here’s the transcript of the recipe I recorded on tape back then. You might notice it does not list the ingredients and amounts at the top – that conventional method requires constant rewinding, difficult to do when your hands are full of bread dough!
Egg Braid Bread
Put one-half cup lukewarm water in a large coffee cup. Add one package yeast, stir a bit and let it rise. While you’re waiting, get out a large bowl that’s safe in the microwave. Put 2 cups milk, 2 Tablespoons sugar, 1 Tablespoon salt and one-half stick butter into that bowl. Place it in a microwave, turn the microwave on for 30 seconds, take the bowl out and blend with a big spoon. Touch the mixture lightly with your fingers, and if it’s not lukewarm yet, put it back in. Keep checking every 30 seconds or so, and when the liquid feels lukewarm, take the bowl out and blend three egg yolks and two egg whites into the mixture (save the extra egg white in a small bowl in the refrigerator for glazing later).
In a different bowl, put 4 cups flour, gently push your fist into the middle of the flour to make a well. Put your yeast & water mixture in the well, then add the lukewarm milk mixture Stir, and once its blended start kneading it with your hands while it’s still in the bowl –this prevents flour from getting all over the kitchen, hard to clean when you can’t see!
Once you’re done kneading, take the ball of dough out of the bowl, rub that bowl with butter, place the kneaded ball back into the buttered bowl, roll the dough around the bowl so it’s slightly buttered, place a dry dishtowel over the ball and set it aside to rise for about two hours. While it’s rising, butter two cookie sheets. When the dough is risen, gently deflate it with a fist and then split the ball into six relatively even pieces. Using both hands, Roll each piece against the counter top into a rope about one foot long. Place three of the ropes side by side on one cookie sheet and braid them. Do the same on the other cookie sheet with the leftover three ropes. Cover each braided loaf with plastic wrap and put them in the refrigerator for anywhere from 2 to 24 hours.
When you’re ready to bake the bread, set the oven for 375 º. Take the loaf you want to bake out of the refrigerator. Let it sit for a bit while you make the glaze. Use a fork to stir a Tablespoon or so of water into the cup with the egg white (remember, it’s in the refrigerator, too). Use your hands to lightly brush the glaze over the loaf. Bake it in the oven for 35 minutes, or until it feels set. You can double-check if it’s done by thumping the loaf. If you hear a hollow sound, it’s done. Remove the bread from the oven, place it on a rack to cool, and then…Eat!


 Back in May 2018, I wrote a
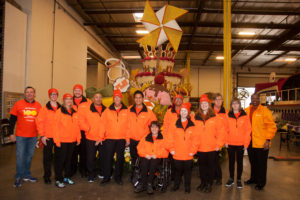
 To danny Blake, Reagan Crabtree, Lora Glassman, Ernesto Gutierrez, Matthew Jameson, Howard McBroom, Brian Nguyen, Katie Pena, Blake Scribner, Kaison Shipp-Collier, Sabrina Stafford and Sophia Stafford, I say thank you on behalf of Easterseals for demonstrating to the world how people with disabilities should be included in all events and milestones as well as how Easterseals helps people live, learn, work and, in this case, play in their local communities!
 A friend sent me a text the other day that said this: “Wishing you a prosperous new year excited face with money symbols for eyes and stuck-out tongue excited face with money symbols for eyes and stuck-out tongue excited face with money symbols for eyes and stuck-out tongue excited face with money symbols for eyes and stuck-out tongue. You guys free tonight? Give me a call.”
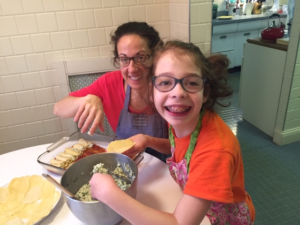
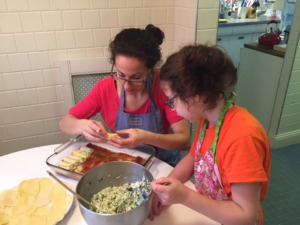 Start with the onions in a deep pot – sauté in olive oil. Once they are translucent, add the garlic & mushrooms. Sautee for another 5 minutes or so. Add the tomatoes, the herbs & salt/pepper/red pepper. Cook for a long time. Mom cooks it all day, so it becomes a thick sauce. Add tomato paste if it seems too watery after a few hours.
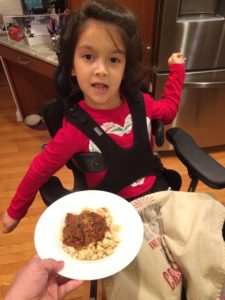
 Our son was diagnosed with developmental and physical disabilities when he was just one month old. Gus was immediately scheduled for physical, occupational and speech therapy, and when I Confided my worries about him to my sister that I didn’t notice Gus making progress, she introduced me to a friend of hers who had an eight-year-old daughter with severe disabilities. The first thing this woman recommended? “Start going to church.” She insisted this wasn’t for religious reasons. ““You’re with Gus every day, it can be hard for you to notice some of the little changes,” she said, explaining that people who see her daughter and her in church just once a week notice Susan’s progress. “They tell me so, and that can make me feel better.”
 After President George Herbert Walker Bush died Friday, the news has been full of stories about his service. One big story missing in all that? George Herbert Walker Bush is the president who signed the Americans with Disabilities Act (ADA) into law.
 November is Assistive Technology Awareness Month, and this being the last day of November, guest blogger Liz Davis is here to share an assistive technology journal she kept for us one day to remind everyone the important role assistive technology plays in the lives of people with disabilities. A UX Designer at QuikOrder in Chicago, Liz has used a wheelchair all her life. Her experience in dealing with the obstacles of an environment lacking accessibility has granted her a useful perspective in handling design.